Managing Webhooks
All webhooks are created and managed from the dashboard. Location: Left Sidebar → Settings → Webhook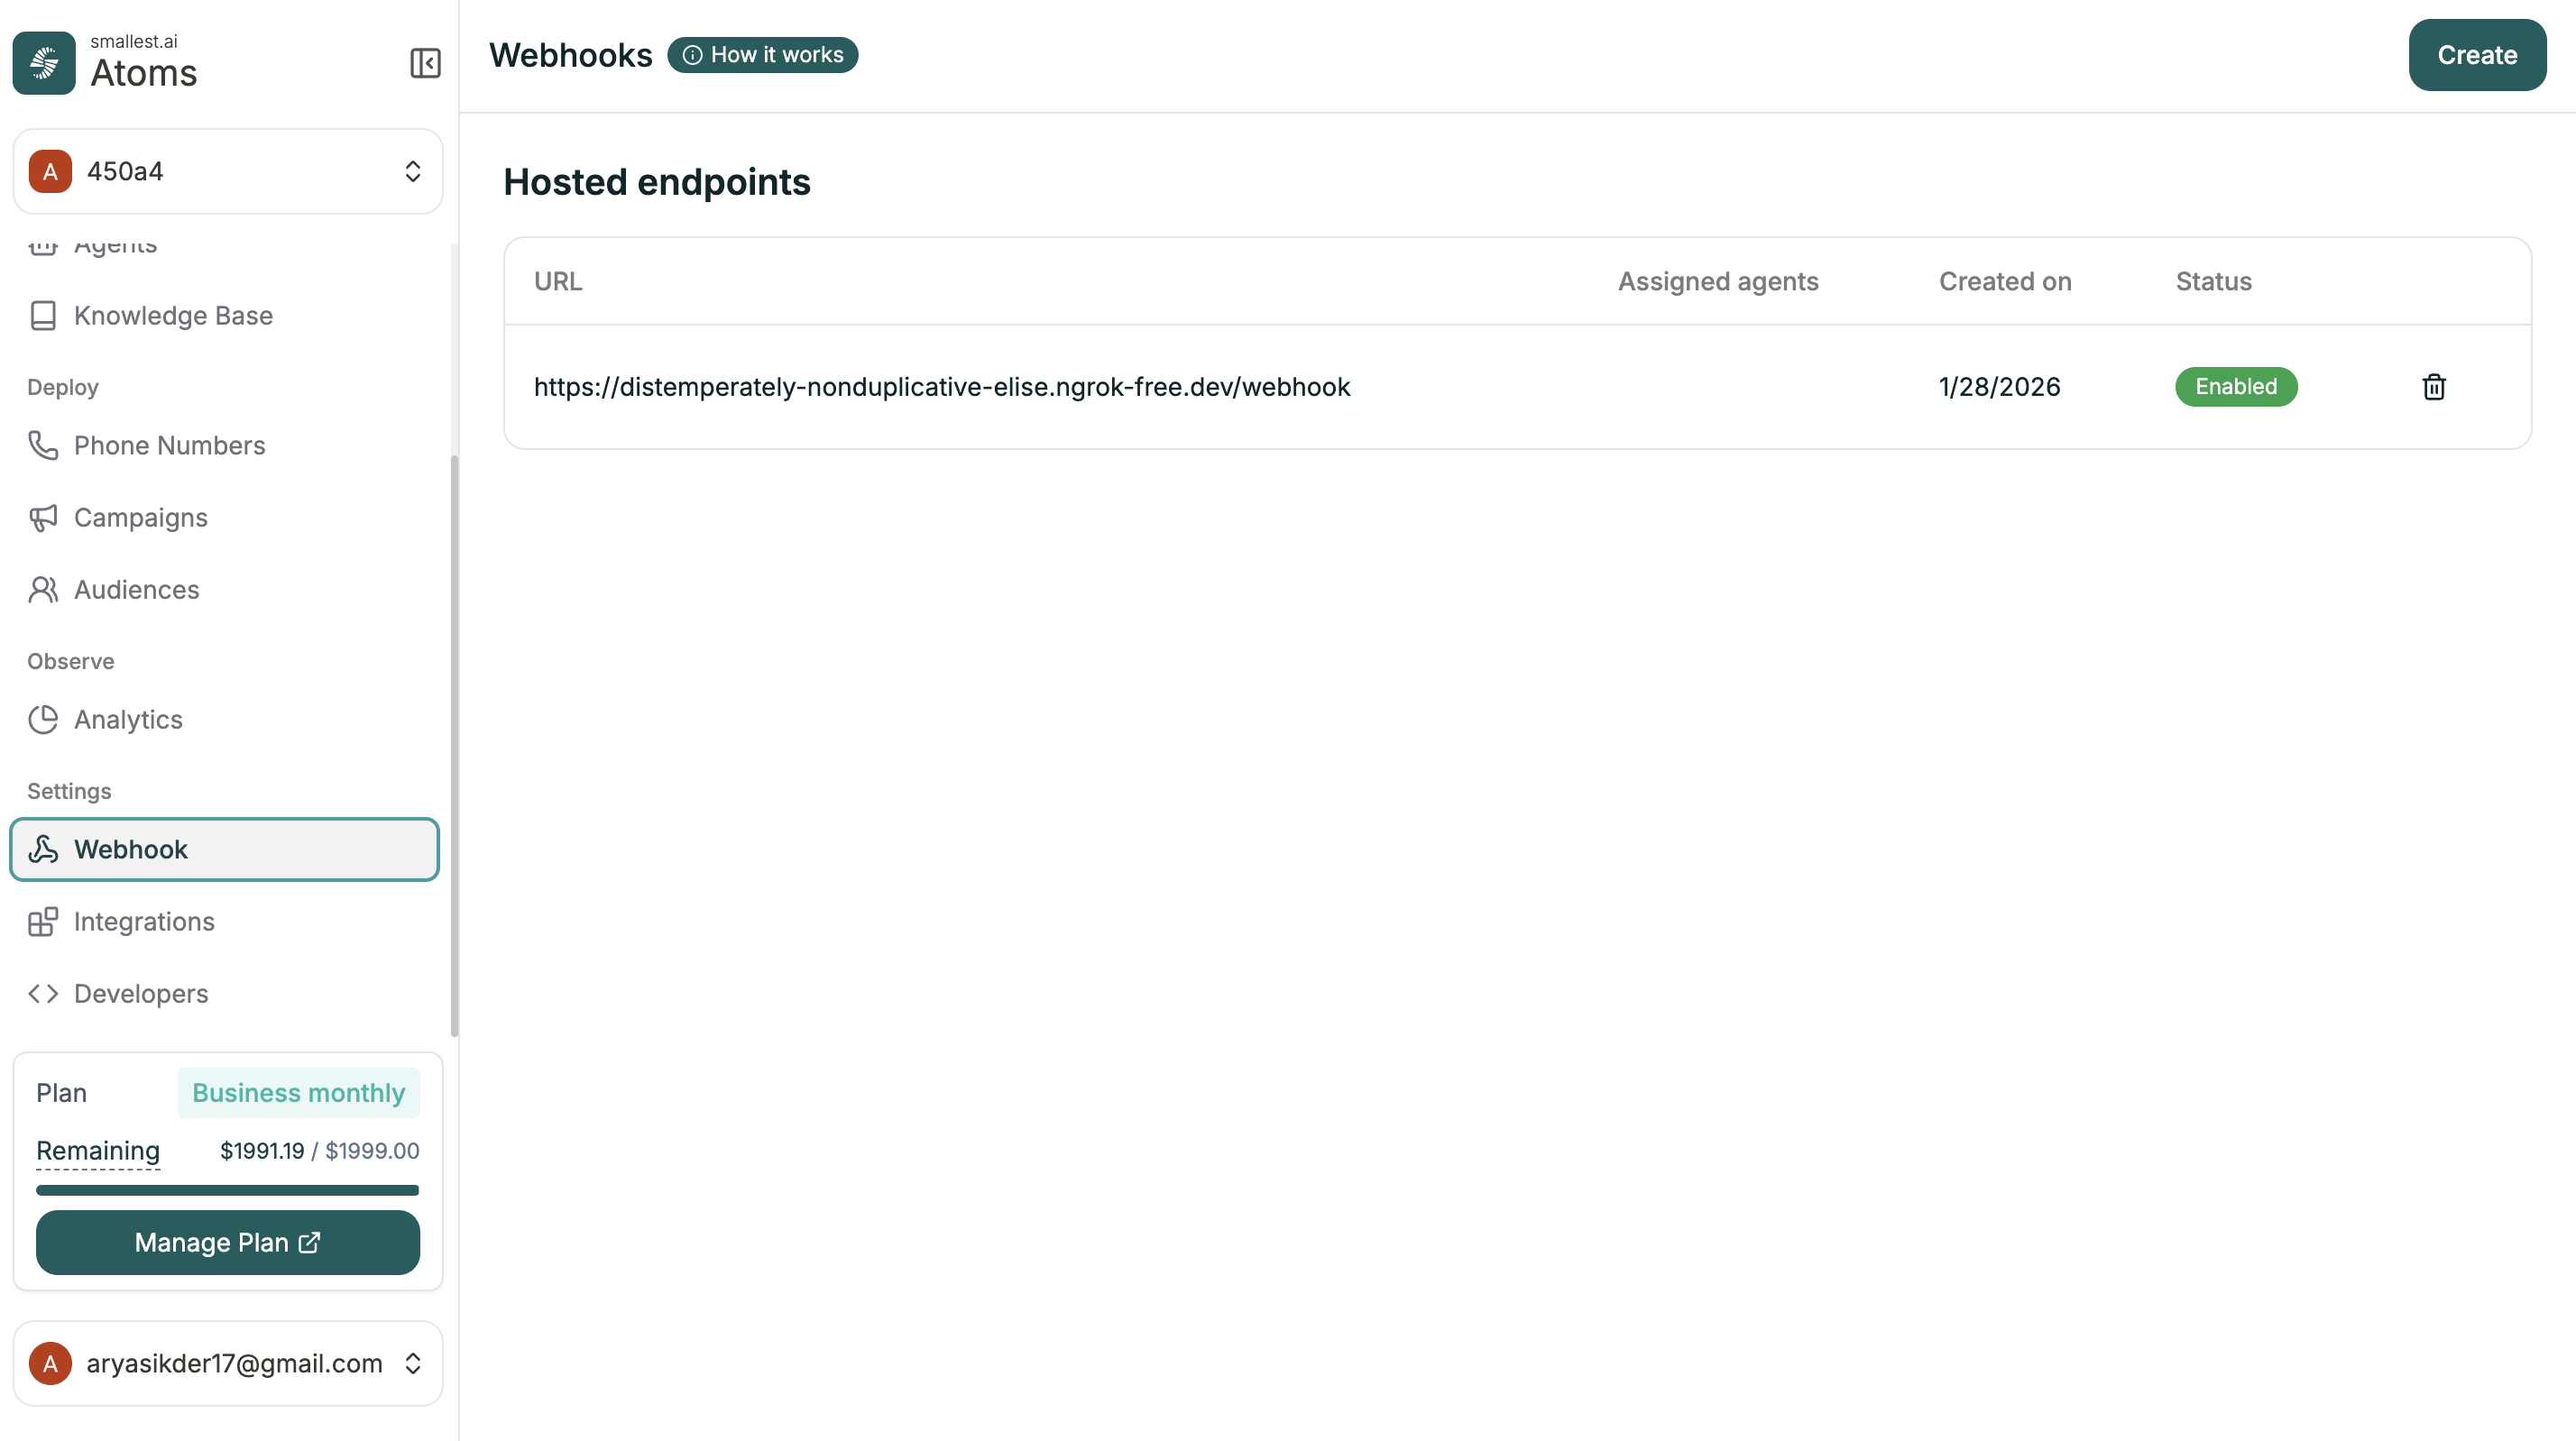
Creating a Webhook
Click Create to add a new webhook endpoint.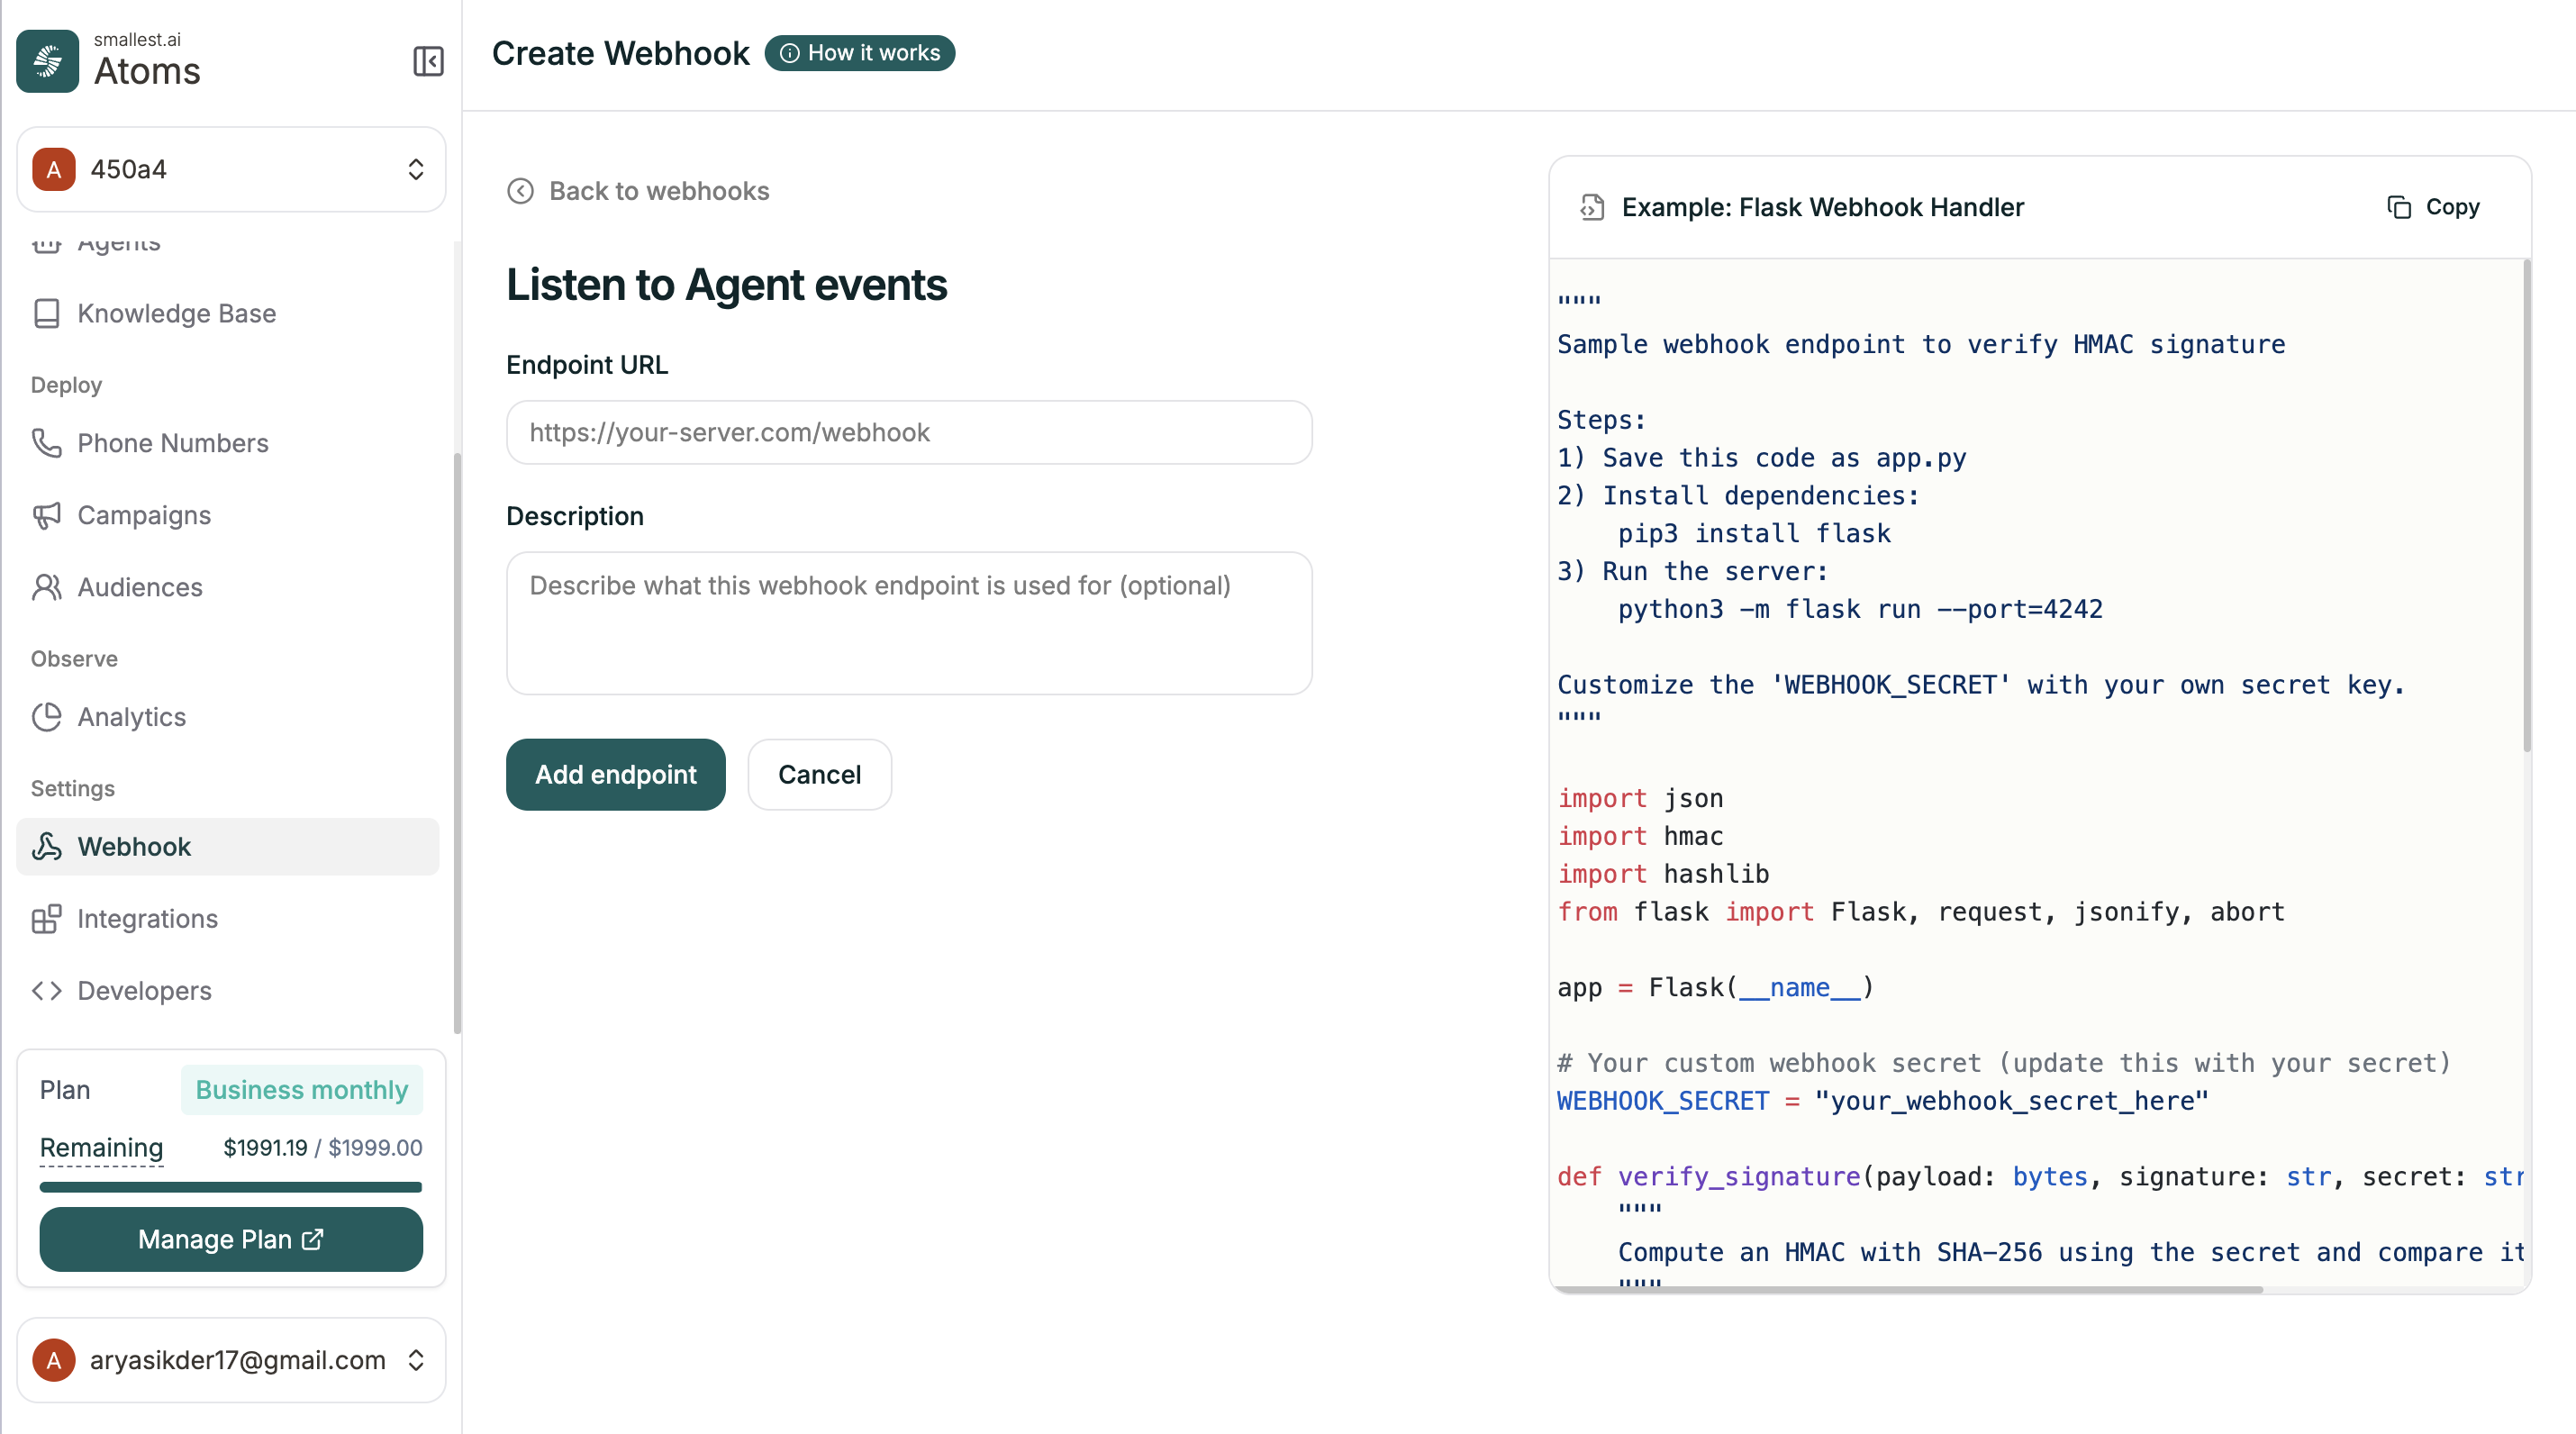
| Field | Description |
|---|---|
| Endpoint URL | Your server URL that receives the POST requests |
| Description | Optional note about what this webhook is for |
Webhook Details
Click any webhook to see its details and subscriptions.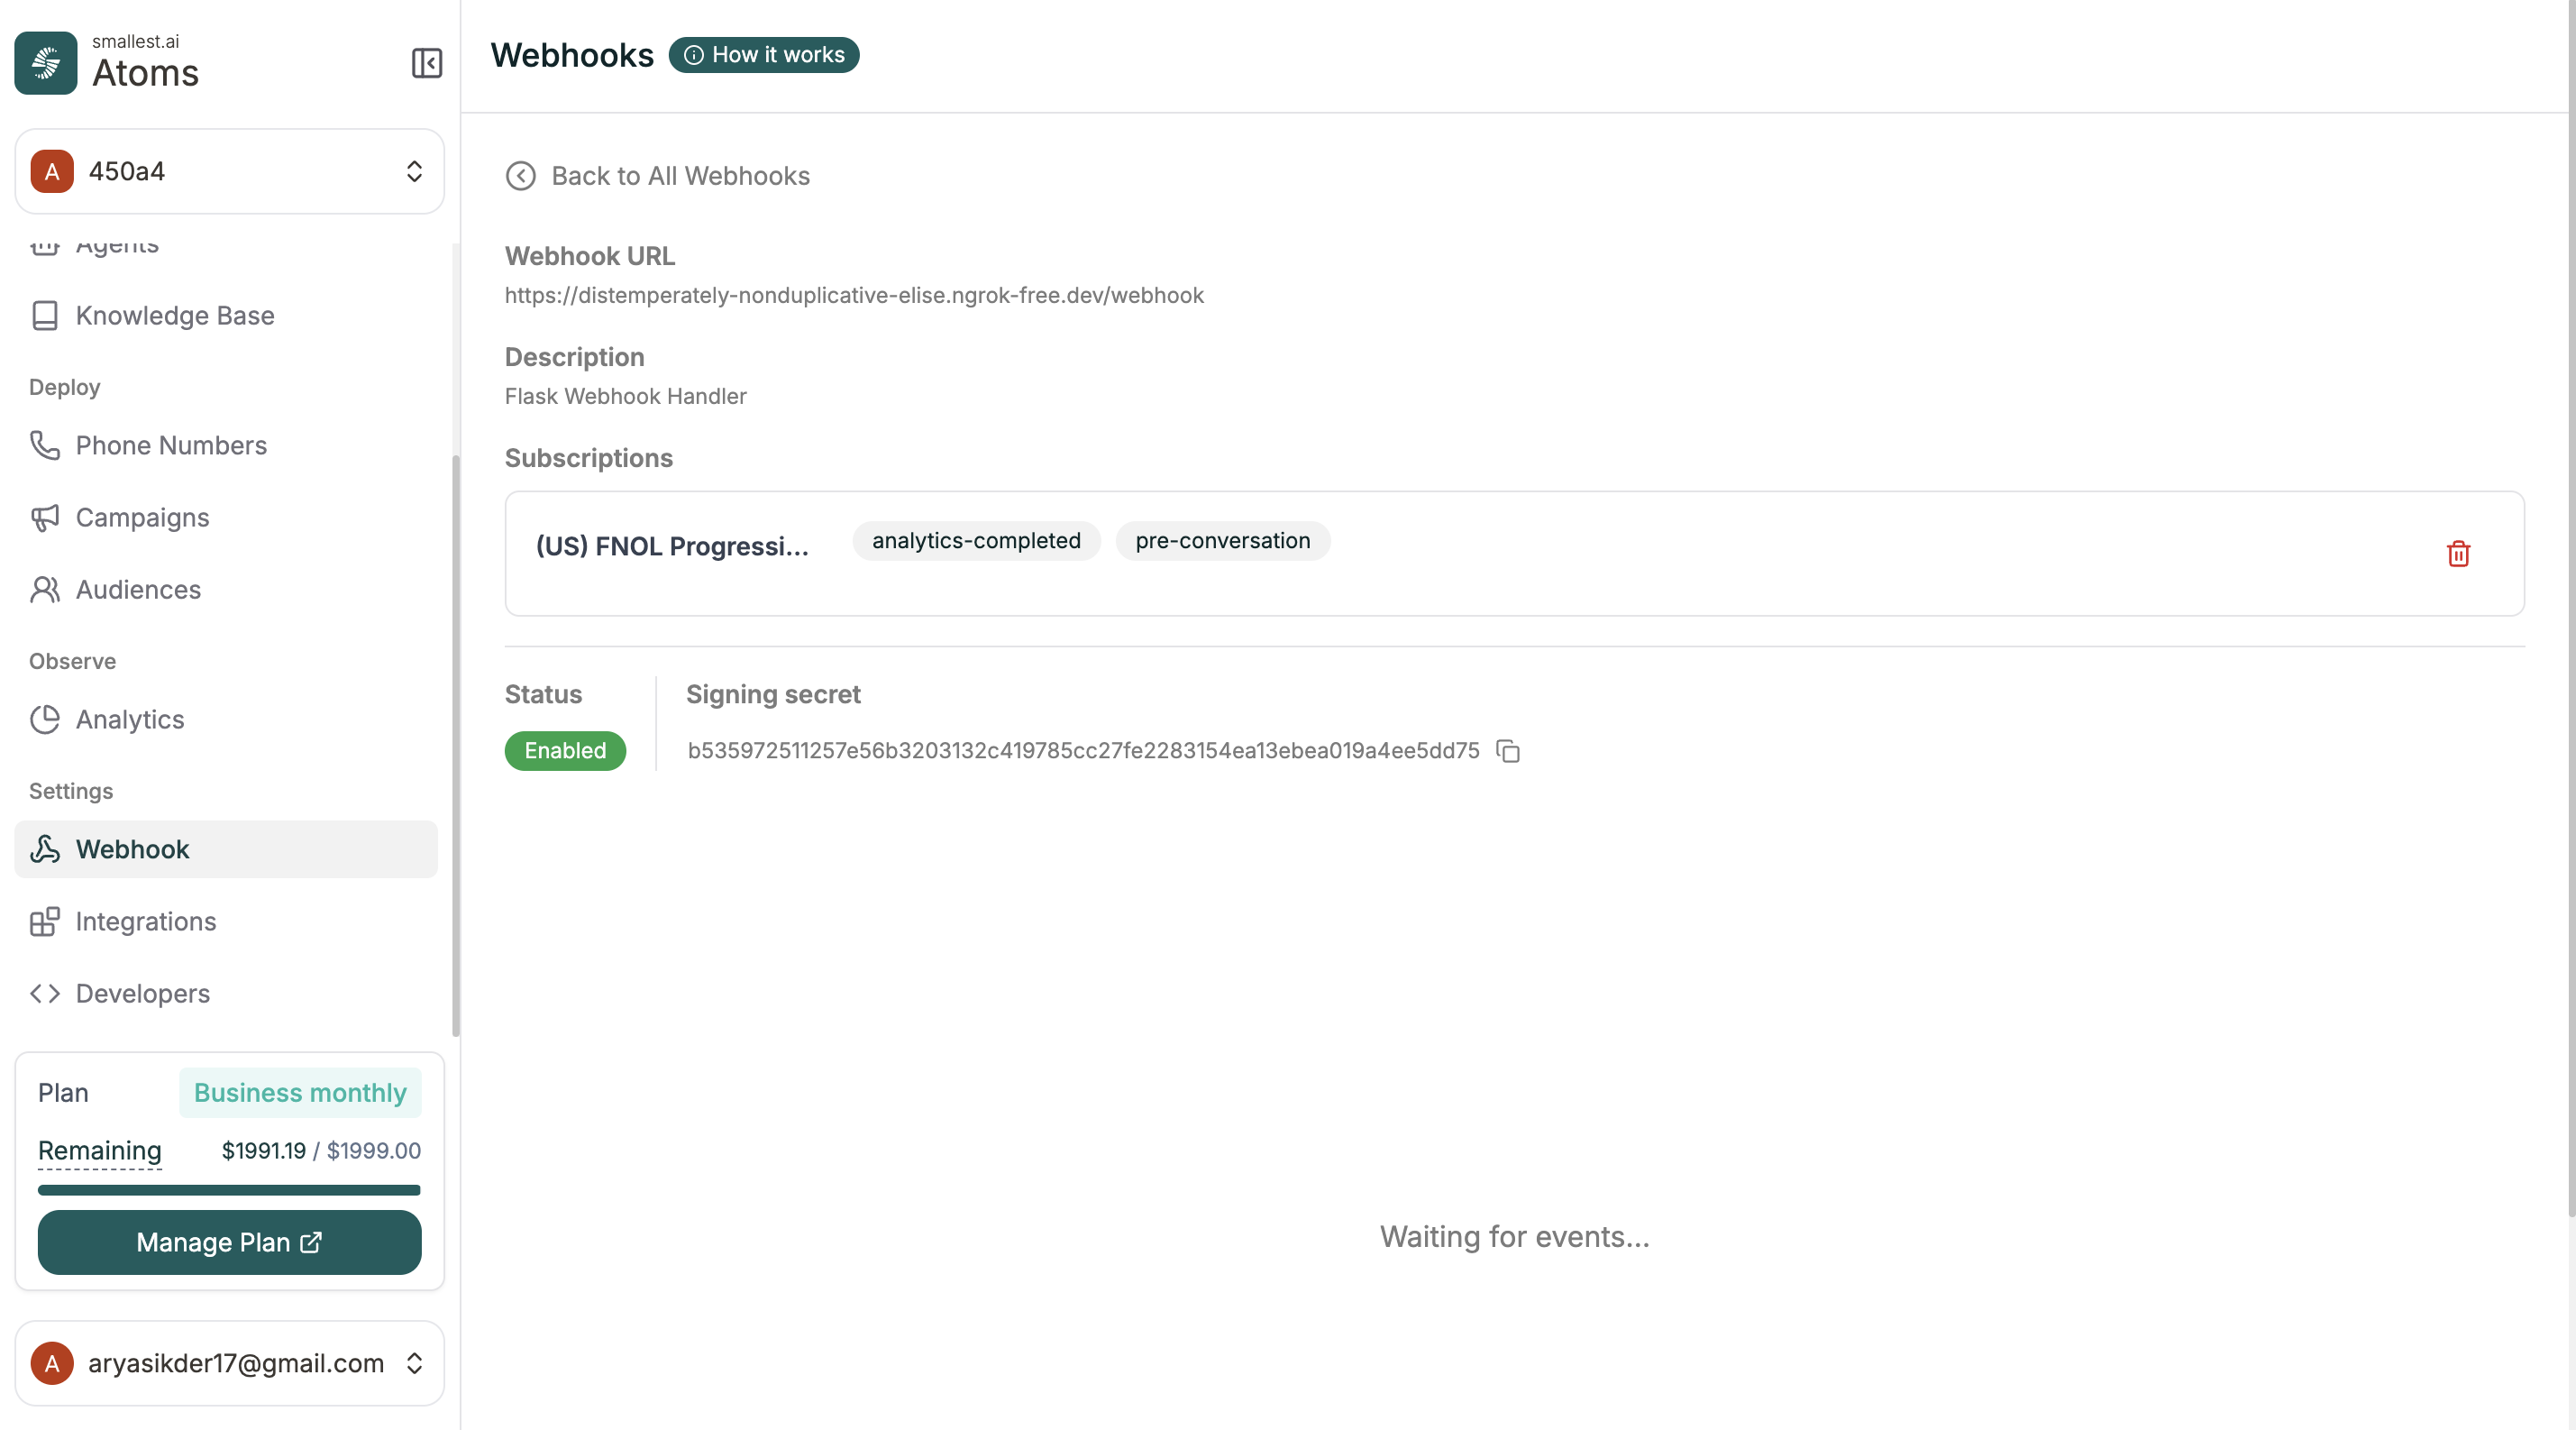
| Field | What It Shows |
|---|---|
| Webhook URL | The endpoint receiving events |
| Description | Your note |
| Subscriptions | Which agents are using this webhook and what events |
| Status | Enabled or disabled |
| Signing Secret | For verifying requests are from Atoms |
Adding to an Agent
Once a webhook exists, connect it to your agent. Location: Agent Editor → Agent Settings → Webhook tab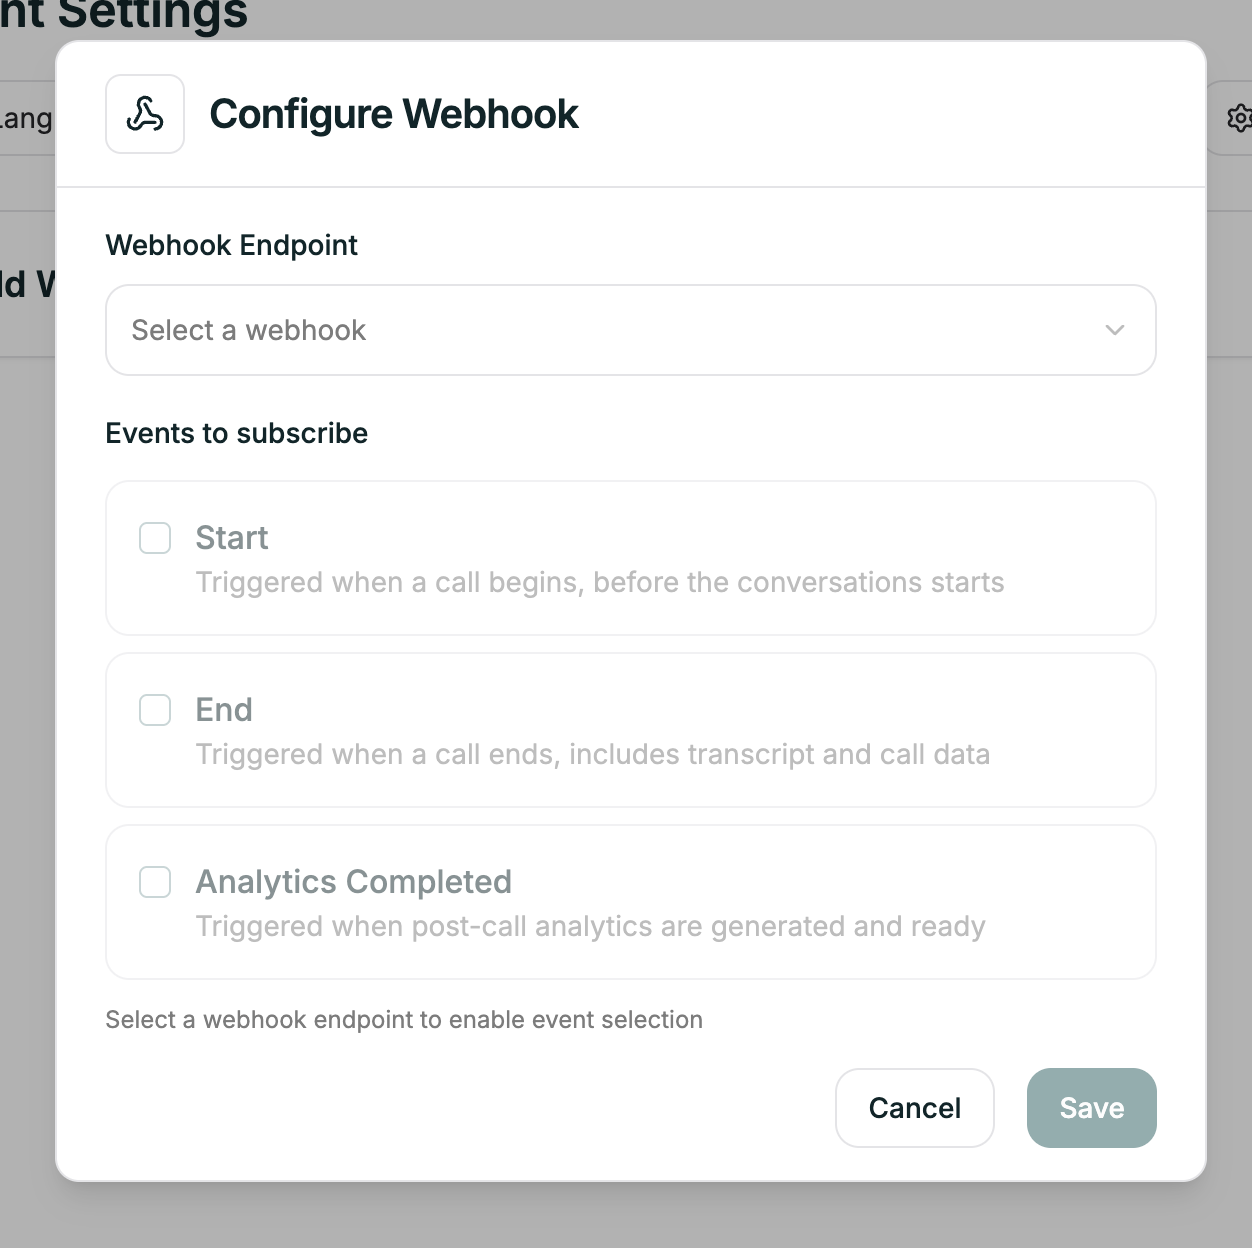
Events
| Event | When It Fires |
|---|---|
| pre-conversation | Call is about to start |
| analytics-completed | Post-call analysis is ready |
Payload Data
Each event sends relevant data: pre-conversation:- Caller phone number
- Agent ID
- Call direction
- Timestamp
- Full transcript
- Call duration
- Post-call metrics
- Variables collected
Tips
Verify signatures
Verify signatures
Use the signing secret to verify requests actually come from Atoms. The example code in the Create modal shows how.
Handle failures gracefully
Handle failures gracefully
If your endpoint is down, events may be lost. Log everything and consider retry logic.
One webhook, multiple agents
One webhook, multiple agents
You can connect the same webhook to multiple agents. The payload includes the agent ID so you know which agent sent it.
Related
Integrations
Connect Salesforce, Zendesk, and more
API Calls
Make requests during conversations